Uploading Videos to YouTube
In order to upload Videos to YouTube you will need a Google account. The same is true for using other useful Google services like Google Maps, Hangouts, Google Drive, Google Photos and Google+ Also, you need to download and install the YouTube app for iOS on your iPhone or iPad, in case you haven’t already done so.
YouTube Privacy Settings
It is really important that you understand the privacy settings for YouTube videos, so that you do not make the mistake of making your personal videos visible to over a billion YouTube Users. Here is a listing and brief description of YouTube privacy settings that you need to understand before uploading any of your Videos to YouTube. Public: In simple terms, this means that anyone can see your video. Use this setting for videos that can Educate, Inform, Entertain, Motivate or create awareness about a product or service. Also, make sure that you are the rightful owner of the videos that you upload for public view. Private: Videos with private setting can only be seen by you. Private videos do not appear on your YouTube channel and cannot be discovered by others. However, you can choose to provide access to selected people to view your private videos. Unlisted: Videos marked as unlisted can only be viewed by those who have a link to the video. Unlisted Videos are not listed on your YouTube channel and are not discoverable via YouTube search. Scheduled: This setting is designed for launching a Video Campaign and allows you to upload videos and prevent them for being viewed by public until a date and time of your choosing. Now that you understand the privacy settings, let us get started with the steps to upload YouTube Videos from your iPhone or iPad.
Upload Videos to YouTube From iPhone or iPad
Since you have never done it before, uploading Videos to YouTube might seem like a geeky and complicated process to you. However, the process is very simple in case you are uploading videos from your iPhone. As mentioned at the beginning of this article, there are two ways of uploading videos to YouTube from your iPhone or iPad and you will find below the steps for both the methods.
Upload Videos to YouTube Using Photos App
The easiest way of uploading Videos to YouTube from an iPhone or iPad is to do it directly from the Photos App by using the Share options available within the Photos App.
Tap on the Photos App on your iPhone or iPad 2. Next, tap on the Videos Folder or any other folder where the Video that you want to upload to YouTube is located.
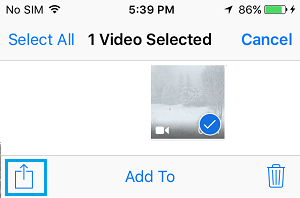
Select the Video that you want to upload to YouTube by tapping on it.
Next, tap on the up Arrow shaped Share icon, from the bottom left corner of your screen (See image above)
You will see a Share Menu providing you with multiple options to share the Video.
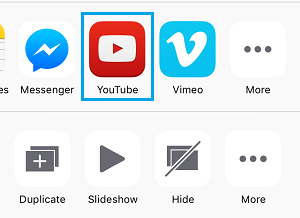
Tap on YouTube. Scroll through the options or tap on More in case you do not see YouTube right away. Note: You may be asked to login to your Google Account in case you are not already logged in.
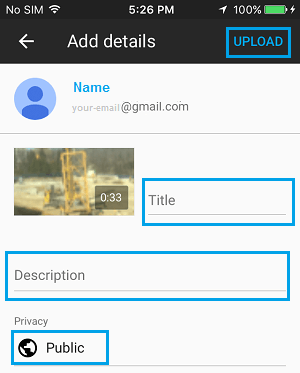
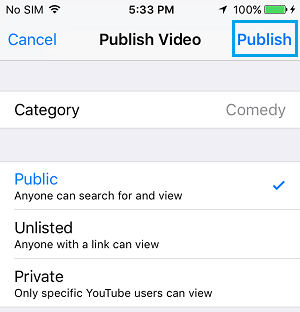
On the next screen, you need to provide a Title for the video, provide a brief Description, choose the Video Category (Comedy, How-to, etc;) and choose whether you want to make the video Public, Private or Unlisted from YouTube Privacy Options.
Once you are done with step 7, tap on Publish from the top right corner of your screen.
Upload Videos to YouTube Using YouTube App
Uploading Videos to YouTube using the YouTube app provides you with more options than uploading it directly from the Photos App. You will be able to trim the Video, use filters and apply music to your YouTube Video.
Open the YouTube app on your iPhone or iPad by tapping on the app icon.
Next, tap on YouTube’s My Account icon (See image below).
You will be asked to sign in to your Google Account, in case you are not already signed in. 4. Once you are signed-in, tap on the Video icon.
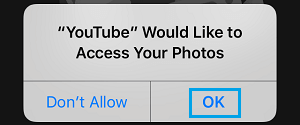
If this is the first time that you are uploading a video to YouTube, you will see a popup asking you to provide access to Photos on iPhone. Tap on OK to provide access.
Next, select the Video that you wanted to upload to YouTube. You will be within the Videos folder on iPhone and will be able to browse through videos and select the Video for upload by tapping on it.
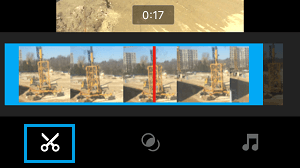
On the next screen, tap on the Scissor icon from the bottom left corner of your screen. This will allow you to trim the Video length by moving the slider with your finger to a desired point on the Video.
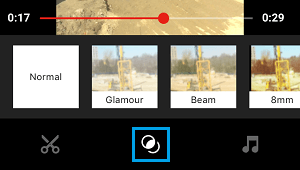
Next, you can Apply filters to the Video by tapping on the Filter icon – Choose from Normal, Documentary and other modes.
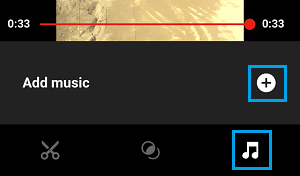
9. Tapping on the Music icon allows you to add music to your Video. You will be able to choose music for your Video by tapping on the “+” icon.
Once you are happy with the Video length, Filter (in case you have decided to use one) and Music, tap on Next.
On the next screen, provide a Title to your Video, add a Description and choose a Privacy setting.
Finally, tap on Upload from the top right corner of your screen to upload the Video to YouTube (See image above)
![]()
![]()
![]()