Uninstall Skype for Business
Skype for Business either comes as a part of Windows 10 operating system and is also bundled with certain versions of Office 365 program. If your computer has become noisy and running slow, the problem is most likely to be due to Skype For Business running in the Background and consuming excessive resources on your computer. You can hope to improve the performance of your computer by preventing Skype App from starting automatically on your computer and also by Uninstalling Skype for Business.
1. Disable Skype for Business Auto Start & Sign-in
The simplest way to prevent Skype for Business from causing problems on your computer is to prevent the program from automatically starting on your computer.
Open Skype for Business and Sign-in to your Account (If you are not already signed-in).
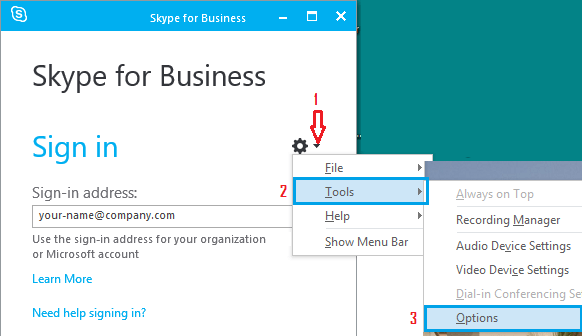
Once you are logged-in, click on Skype Settings icon > select Tools and click on Options in the side-menu.
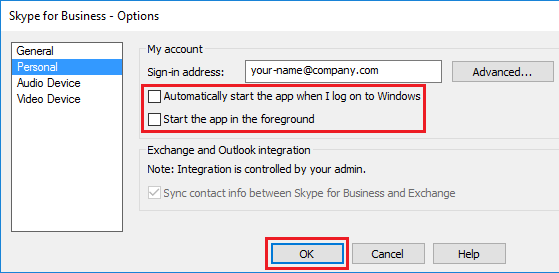
On the options screen, select the Personal tab in the left-pane. In the right-pane, uncheck Automatically Start the App When I log on to Windows and Start the App in the foreground options.
Click on OK to save these settings on your computer.
Click on Skype Settings Icon again and this time select File and click on Exit. After this, you will no longer find Skype for Business starting up with your computer and consuming resources on your computer by running in the background.
2. Uninstall Skype for Business Using Settings
If you do not want to use Skype for Business, it is possible to completely Uninstall Skype for Business from your computer. This method requires you to first delete your Sign-in info from Skype and then uninstall the App using Control Panel.
- Launch Skype for Business on your computer and Sign-out of the program.
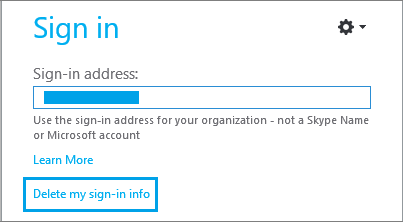
- On the Sign-in screen, click on Delete my Sign-in info link.
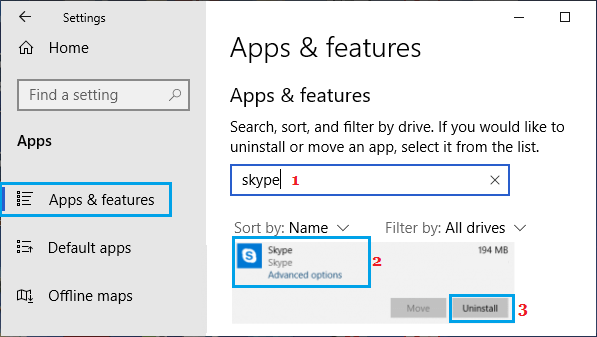
This will clear your User Profile Cache in Skype for Business and also disable the Auto Sign-in, when Skype Starts on your computer. After this, you will be able to Uninstall Skype for Business from your computer, just like any other App or Program by going to Settings or from the Control Panel. 3. Go to Settings > Apps > select Skype for Business and click on the Uninstall option.
3. Uninstall Skype for Business Using Control Panel
If you prefer using Control Panel, you can follow the steps below to Uninstall Skype for Business using Control Panel.
- Open Skype for Business and Sign-out of the program.
- On the Sign-in screen, click on Delete my Sign-in info link.
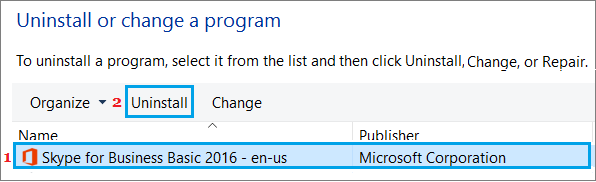
3. Open Control Panel > navigate to Programs > Programs and features > Uninstall or Change a Program. 4. On the next screen, select Skype for Business and click on the Uninstall option.
Note: If you do not see Skype for Business listed, it means that the Skype for Business installed on your computer is integrated with Office 365 and it cannot be uninstalled.
How to Hide Background During Skype Video Calls How to Stop Skype From Starting Automatically on Mac