Add Local Account to Windows 11 Computer
When you setup New Windows 11 computer, you will see the option to either use your existing Microsoft Account or create a New Microsoft Account. There is no way to bypass this requirement in Home Edition of Windows 11, while Professional Edition of Windows 11 provides the option to setup computer using both Microsoft and Local User Account. However, after the computer is setup, you can create any number of Local Accounts and even convert the Microsoft Account into Local Account (if you do not want to use it). There is no limit to the number of Local Accounts that can be created in Windows 11 and you can also grant Admin Privileges to any Local User Accounts on your computer.
Steps to Create Local Account in Windows 11
Login to your computer using Microsoft Account or a Local Admin Account and follow the steps below to Add a Local Account to your Windows 11 computer.
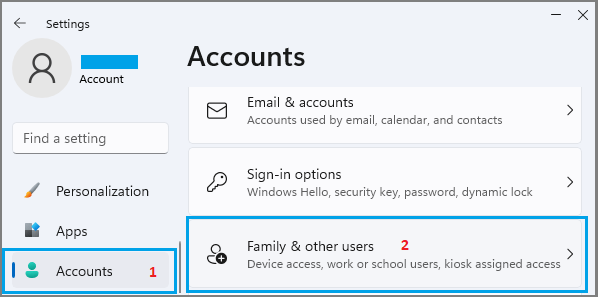
Click on Windows Start button > Settings icon > select Accounts in the left-pane. In the right-pane, scroll down and click on Family & Other Users.
On the next screen, click on Add Account button, located under “Other Users” section.
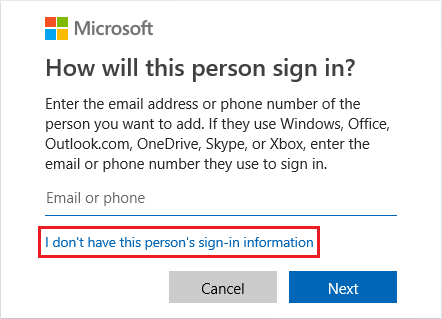
On the next screen, click on I don’t have this person’s sign-in information link.
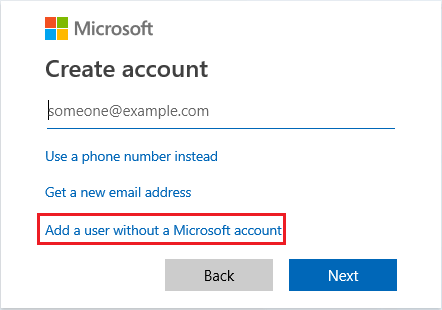
On Create Account screen, click on Add a user without a Microsoft account option.
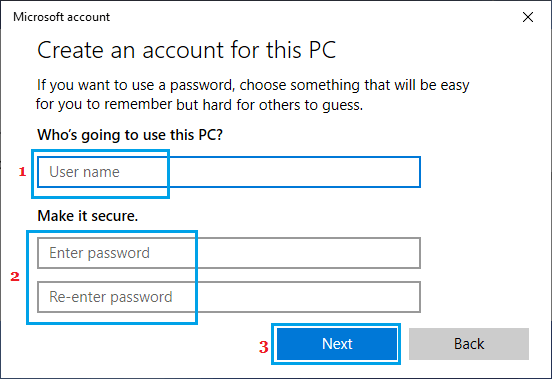
On the next screen, you will see the familiar Windows Account creation screen. Enter the User Name, Password, re-enter Password for your new Local User Account and click on Next.
Once you click on Next, Windows will take you back to Accounts screen where you will be able to see the New Local Account that you just created on your computer. Note: You need to be logged in to Microsoft Account or Local Admin Account to create New Accounts on your computer.
2. Grant Admin Privileges to Local Account
By default, Windows 11 creates Local Accounts with standard privileges, but you can always convert any Standard Local Account to Admin Account by following the steps below.
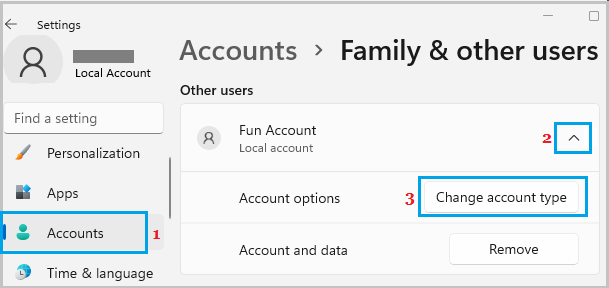
Click on Windows Start button > Settings icon > select Accounts in the left-pane. In the right-pane, scroll down and click on Family & Other Users.
On the next screen, click on the Local Account that you want to change and select Change Account Type option.
On the next screen, click on the Down Arrow under Account Type and select the Administrator option.
Click OK to complete the User Account Type change on your computer.
How to Create Local Account in Windows 10 How to Reset Microsoft Account Password