AutoFit Column Width in Excel
By default, the size of the Columns and Rows remains fixed in Microsoft Excel and does not change when you input data into the cells. However, the AutoFit feature in Microsoft Excel allows you to alter its fixed grid like structure and make an Excel worksheet to automatically adjust its Column widths and Row Heights to match the size of data being input. This can be achieved by AutoFit feature in Microsoft Excel, which is designed to automatically change the size of columns and rows to match the size of data input.
Limitations of Excel AutoFit Feature
Before going ahead with the steps to AutoFit Column Width and Row Height in Excel, you need to be aware of the following limitations of this feature. Note: Font Size, italics, bolding and special characters can reduce the number of characters that an Excel column can hold.
1. AutoFit Column Width in Excel
Follow the steps below to AutoFit Columns in Excel
Open a Microsoft Excel Worksheet.
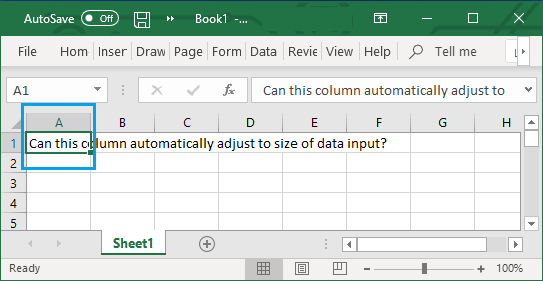
Type something longer than 8 characters into Column A and you will see the input spilling over into the adjacent columns.
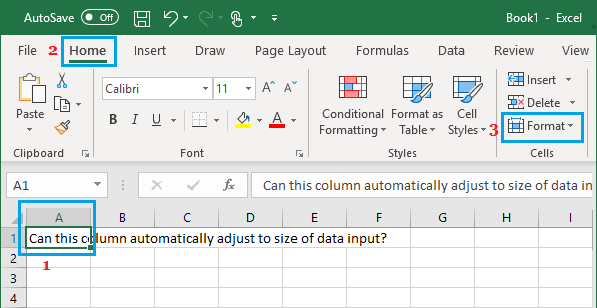
Now, select Column A > click on the Home tab in top Ribbon menu and locate the Format option in “Cells” section of the menu.
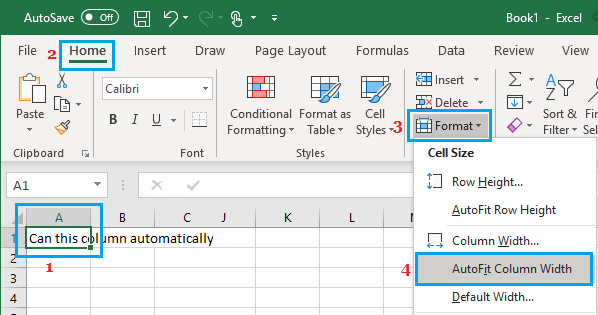
Next, click on the Format and select AutoFit Column Width option in the drop-down menu.
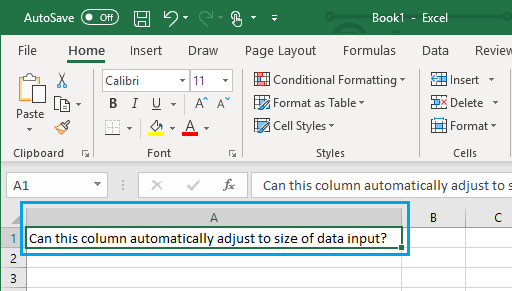
Once you click on AutoFit Column width you will see Column A automatically adjusting its width to accommodate the size of the input Data.
Apart from AutoFit Column Width option, the Format Drop-down menu also provides “Column Width” and “Default Width” options. Column Width: Selecting this option allows you to manually change the width of a column by typing its required size. Default Width: Selecting this option changes the default width of columns for the entire worksheet. AutoFit Column Width: Selecting this option automatically changes the size of the column to match the length of the contents of the cell in the column that takes up the most space.
2. Quick Way to AutoFit Column Width in Excel
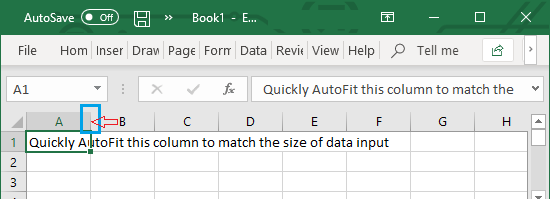
Instead of going through menus, you can AutoFit a column by selecting the column and double-clicking on the boundary of the selected column. Simply, select the Column that you want to AutoFit and double-click on the right side boundary of the selected column.
You will immediately see the Column automatically adjusting its width to the size of Data input. At any time, you can reset all the Column widths back to their default width (8.43) by selecting Format > Default Width and typing 8.43.
3. AutoFit Row Height in Excel
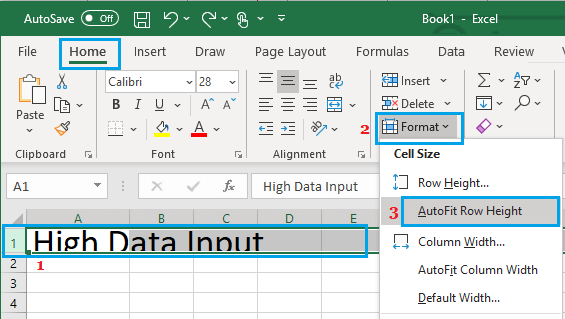
In general, Microsoft Excel automatically adjusts Row Heights to match the height of the data being input. Hence, the “AutoFit Row Height” feature in Excel is rarely used. In older versions of Excel, you may find Row Heights not adjusting automatically while pasting data into Excel Worksheet. If this happens, you can easily fix the problem by selecting the Row containing the oversized text and clicking on Format > AutoFit Row Height.
This will make Microsoft Excel to automatically change the Row height to match the height of Data being pasted.
How to Transpose Columns to Rows in Excel How to Freeze Rows and Columns in Excel