Protect Your Privacy on iPhone
As you may have noticed, most Apps on iPhone request permission to access Contacts, Camera, Microphone, Photos and Location, either during installation or while they are being used. This often results in many users ending up providing unwanted Apps with permission to access the Microphone, Camera, Contacts, Location Data and other details. Luckily, the General and Privacy Settings on iPhone can be easily tweaked to improve and protect your privacy in much better way.
1. Prevent Apps from Asking to Track your Activity
An easy way to rule out the possibility of accidentally or unknowingly allowing Apps to track your Activity on iPhone is by preventing unwanted Apps from asking to track your Activity. Before going ahead with this step, you need to be aware that certain Apps have valid reasons for tracking your activity on iPhone. For example, you won’t be able to Cast YouTube Videos to TV, if the Chromecast App installed on your device is prevented from tracking your activity on iPhone. Go to Settings > Privacy > Tracking > move the toggle next to All Unnecessary Apps to OFF position.
Note: If the App is necessary, keep Allow Apps to Request to Track to ON position.
2. Prevent Apps from Tracking Your Location
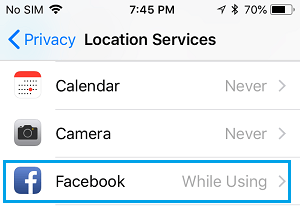
The Location Tracking feature on iPhone is used by Apps like Maps, Weather, Find My iPhone and others to provide Directions, Weather Info and the Location of your Lost or Stolen iPhone. However, there might be other unwanted Apps, tracking your Location Data and sharing this information with various third-party companies. Go to Settings > Privacy > Location Services > select the App for which you want to disable location tracking.
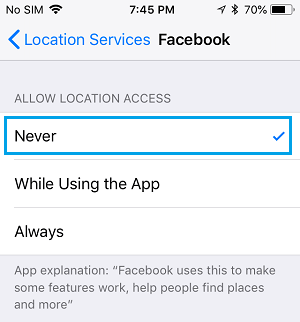
On the next screen, select the Never option to prevent this particular App from tracking your location.
Note: Select While Using the App, if you believe that a certain App has a valid reason to use your location data, while it is being used.
3. Prevent Websites from Tracking Your Location
The Safari browser on iPhone provides the option to both Allow and Prevent websites from tracking your location. Go to Settings > Safari > Location and selecting the Deny or Ask option.
If you select the “Ask” option, Safari browser will be prompting you for permission, whenever any website wants to track your Location.
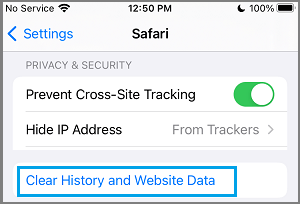
4. Periodically Clear Safari History and Website Data
A good way to protect your privacy on iPhone is to get into the habit of periodically clearing your Safari History and Website Data. Go to Settings > Safari > scroll down and tap on Clear History and Website Data link.
On the confirmation pop-up, tap on Clear History and Data to confirm. This action will clear out all your browsing history, cookies and other website data from your device.
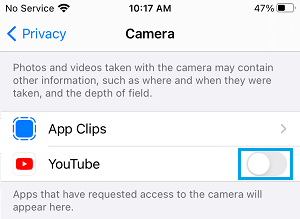
5. Prevent Apps from Accessing Camera
While Apps like FaceTime, Skype or Google Meet have a valid reason to access the Camera on your iPhone, you may have unknowingly provided Camera Access to other unwanted Apps. Go to Settings > Privacy > Camera > move the toggle next to unwanted Apps to OFF position.
This ensures that only the necessary or required Apps have access to Camera on your iPhone.
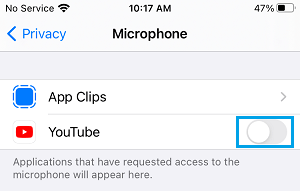
6. Prevent Apps from Accessing Microphone
Similarly, you may have unknowingly provided unwanted Apps with the permission to Access the Microphone on your iPhone. Go to Settings > Privacy > Microphone > disable all unwanted Apps by moving the toggle to OFF position.
Note: If you need turn-by-turn audio directions, you need to provide Google Maps with access to Microphone.
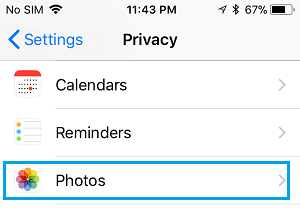
7. Prevent Apps from Accessing Photos
Prevent unwanted Apps from accessing the Photos on your iPhone by going to Settings > Privacy & Security > Photos.
On the next screen, you will see the list of Apps requesting access to Photos on your iPhone.
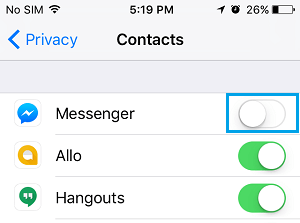
8. Prevent Apps from Accessing Contacts
Prevent unwanted Apps from accessing your Contacts by going to Settings > Privacy & Security > Contacts and move the toggle next to Unwanted Apps to OFF position.
With these steps, you have disabled Facebook Messenger from accessing your Contacts on iPhone.
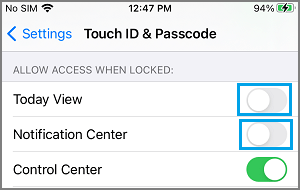
9. Disable Access to Notification Center from Lock Screen
While being able to access Notifications from Lock Screen is convenient, it also allows others to view Notifications on your device, without entering the Lock Screen Passcode. Go to Settings > Touch ID & Passcode > scroll down to “Allow Access When Locked” section and move the toggle next to Notifications Center and Today View to OFF position.
Once access to Notification Center and Today View is removed, no one will be able to View or Access Notifications on your iPhone, without knowing its Lock Screen Passcode.
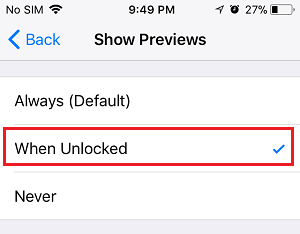
10. Disable Message Previews on iPhone Lock Screen
Message Previews appearing on the Lock Screen of iPhone can also be read by others around you. Hence, iPhone provides the option to disable Message Preview in Notifications. Go to Settings > Notifications > Messages > Show Previews > on the next screen, make sure either When Unlocked or the Never option is selected.
Note: The Never option totally removes Message Previews from both Lock Screen and Control Center Notifications. Similarly, you may want to disable Content in Notifications from other messaging apps like WhatsApp, Signal and others.
11. Turn OFF Live Photos
According to Apple, Live Photos feature on iPhone actually records what happens 1.5 seconds before and 1.5 seconds after you take the picture. The danger with this feature is that you may end up sharing your private, personal or trash talking Video/Audio recording, when you share Photos with others. Open the Camera on your iPhone > select Live Photo Icon and tap on the OFF option.
Once Live Photos are disabled on your iPhone, you will see the Live Photos Icon appearing with a strike mark.
12. Protect Voicemail Messages
According to security researcher Martin Vigo most voicemail systems can be breached by using voicemail cracking tools and other Brute-Force methods that can guess the 4-digit voicemail passcode. Hence, make sure that you setup a strong Password for your Voicemail Account on iPhone by going to Settings > Phone > Change Voicemail Password. On the next screen, enter a strong Password to make it difficult for anyone to gain access to your Voicemail by guessing or using Brute-Force attacks.
Tips to Speed Up Slow iPhone and iPad How to Improve iPhone Battery Life
![]()
![]()